Summertime Vest
sweater - sleeves = vest. I can do a vest.
First, it would be difficult to argue with the fact that knitting is primarily a cold weather activity. Or, more accurately, that knitwear is winter weather wear. Hats, gloves, scarves, socks, sweaters…all lend themselves to comfy cold weather apparel in soft woolens and acrylics. So am I just supposed to quit knitting now that it’s getting warmer? NO.
Second, the ultimate “I’ve made it” goal I set for myself at the start of this journey was to knit myself a sweater. And while I feel like that is still on the horizon, I think a good warm up round (one of many) is this vest I happened upon while scrolling through TikTok (knit-Tok?). The construction is less sweater vest or suit vest and more drapey, airy warm weather tie tank. Think this linen piece from Target. The Vacation Vest appears to be quite versatile, with finished pieces done in cotton, linen, and acrylic with an option to tie the front together or leave it open.
My thinking with this piece is that 1) it’ll be a good piece to learn sizing on and 2) my first non-accessory wearable that will be a challenge without having to get into sleeves, etc. Based on some perusing of several knitting blogs, popular summertime fibers to knit with are cotton, linen/silk blends, and Merino wool. Each fiber will impart a different vibe onto the piece (cotton holds its shape, wool drapes, linen is kind of in the middle but has a rougher texture). I think I want to give linen blend yarn a go (I’m very much on a linen clothing kick as of late) and I think it’ll be a nice, airy fiber to work with.
Here’s to diving into summer with my first big project. I’ll check back in when it’s underway.
Project Info:
Pattern: Vacation Vest by Park & Knit
Yarn: Line by Sandnes Garn, almond colorway, linen and cotton blend, worsted weight
Needles: US 7 and 8 circular
Misc: delight
Update 5/7/2025
gauge gauge gauge
The yarn was delivered yesterday and it’s immaculate. It’s manufactured in Norway and the cotton/viscose/linen mix makes it really light and airy, so it feels much different than the wools and acrylics I’ve worked with before.
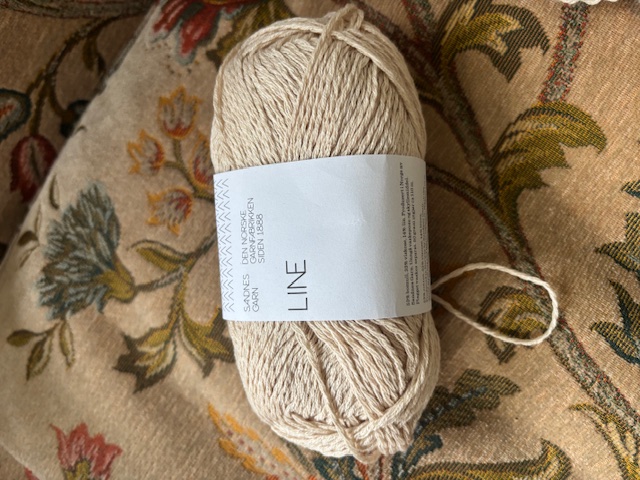
Line, the linen yarn from Norway. Soft and light to the touch, not as stretchy as acrylic or wool.
As for the pattern, I was very intimidated by the length/detail of the instructions but I took the time to read through it beforehand and realized I can safely skip over nearly half since the pattern is extremely size inclusive (sizes XS - 5XL, corresponding to chest sizes of 34-66 inches). I’ll be knitting according to the Medium size, as I measured my chest circumference to 39 inches and Medium is at 42 inches around.
One of my major initial concerns is ensuring I stay faithful to the gauge of this work. I (for only the second time) knitted and blocked a gauge swatch to ensure I had the correct number of stitches per inch. Which I didn’t. The pattern calls for 18 stitches per 4 inches, I had 18 stitches in 3.5 inches. Which means I need to cast on more stitches to get the correct width. BUT I did not like how loose this gauge ends up being. 18 worsted weight stitches per 4 inches == 4.5 stitches per inch which is just too loose for my taste. My vision for this vest is to wear it as a shirt, so minimizing see-through-ness while still maintaining the drapey/airy quality is the goal. So I’ve decided to go down 2 needle sizes which ends up improving the stitch tension so I end up with 9 stitches per 2 inches.
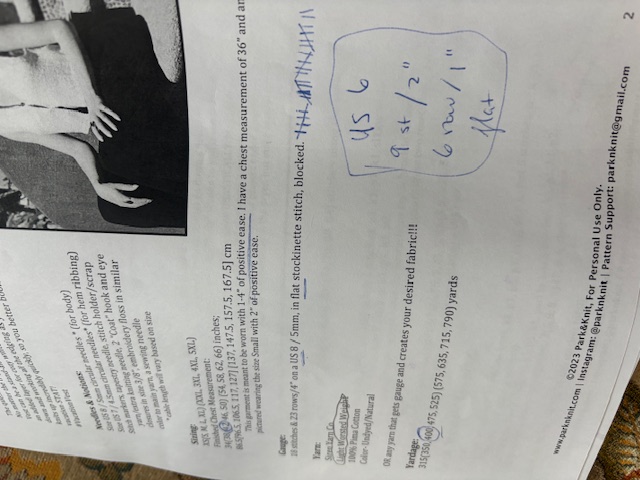
Dissecting a pattern. The size inclusivity for this vest is so impressive.
I’m hoping to actually start on the piece today after yesterday’s gauge bonanza - I’ll check back in when there’s any progress. Or hang ups.
Update 5/29/2025
191 stitches.
If you recall, the original motivation for making this vest (besides the fact it looks good) was as a practice round leading up to making a sweater. Since a vest is just a sweater minus the sleaves I figured this would be easy knit-wise and challenging only in getting the hang of building up different shapes that go into a garment. And to this pattern’s credit, the construction of the vest is so easy to follow. The instructions are clear and based on some fittings at various stages, the sizing and shaping are correct. The biggest struggle I have right now is the fact that this vest is knitted flat - it’s more like a cardigan in construction than a sweater vest which would be knitted in the round. This means that, in knitting the body of the garment, I knit 1 row of 191 stitches and then PAINSTAIKINGLY, TEDIOUSLY, PURL 1 row of 191 stitches.
I will admit, I have majorly struggled with purling since the beginning. It feels akin to trying to write with your non dominant hand. Everything feels awkward, weak, uncoordinated, mirrored. Even my grip on the working strand of yarn feels off, when it should be the same as when I’m holding it for a knit stitch? For ribbing purposes, purling is a necessary evil, but a temporary one (unless you’re making that beanie I made, then you’re doomed to purl-gatory) and so I get through the tediousness by looking forward to the swiftness I’ll achieve when I can just knit. So regarding the construction of this flat knitted vest, I am extremely nervous that my tension is just all over the place from having to turn the piece every row and not just be consistently knitting the entire way through. Prayers to the blocking gods for sure.
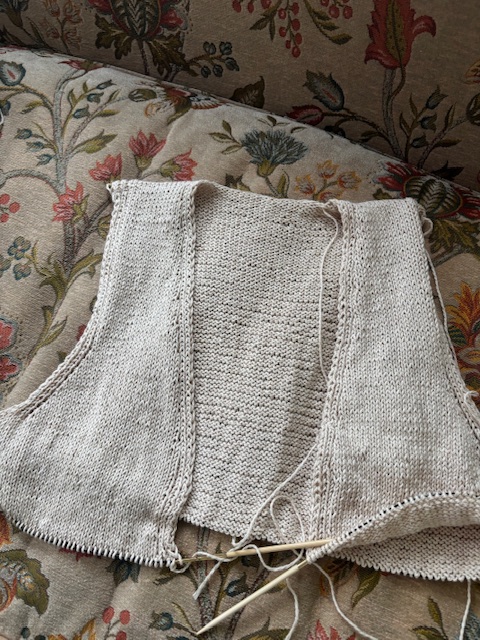
All of that said, I am impressed with how smooth this whole knit has been. It starts with the back of the vest, knitted from top down. Then you pick up stitches for the left and right shoulder/vest front. Then you join the three pieces and cast on a few more stitches for each arm hole. I’m about 1/3 of the way done with the body knit portion and the thing actually looks like a shirt meant for a human being! I love the border detail around the arm holes and down the front where it will fasten, and have a couple of ideas for how to actually fasten it, since I want this to be more of a shirt than an actual open vest.
 |
 |
Left: Progress on the vest, working now on the body. Knit 191, purl 191, repeat for all eternity. At least I have a short torso.
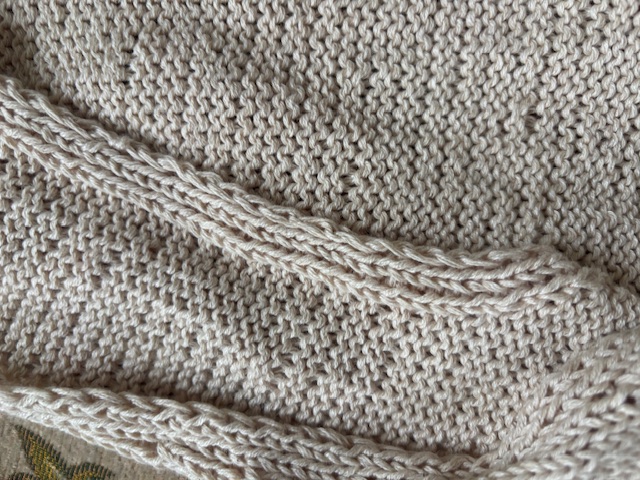
Right: Border detail, a 1x1 rib for 4 stitches with a slip knit stitch for a clean edge.
As you can see, the linen/cotton blend yarn tends to show a lot of texture in the stitches, probably amplified by the tension issues with switching from knit to purl rows (and from stitch increases, like along the armpit, since I still have trouble with the M1R M1L leaving gaps)… that’ll probably will block out. Besides, it adds sort of a rustic, natural touch and all of the linen woven pieces in my closet get wrinkly as hell so this one certainly doesn’t need to be perfect.
Once the body is complete, all that’s left is adding a ribbed hem to the bottom and figuring out how I would want to close the front. I’ll be back when there’s progress.
Update 9/11/25
OOPS. Well, ok. Listen, let me explain.
The vest was technically finished around June 20th or so. I don’t actually have a picture of when it was ~done. I say technically because I finished the pattern, made the i-cord ties to fasten it in the front, and blocked it. But there was a massive elephant in the room (vest): IT DIDNT FIT. Though I swear I followed the gauge swatch calculations and didn’t get too crazy with my tension, it just simply did not fit over my chest. I could tie it close, but the stitches were so comically stretched and the strap/chest panels basically didn’t cover half of my boobs.
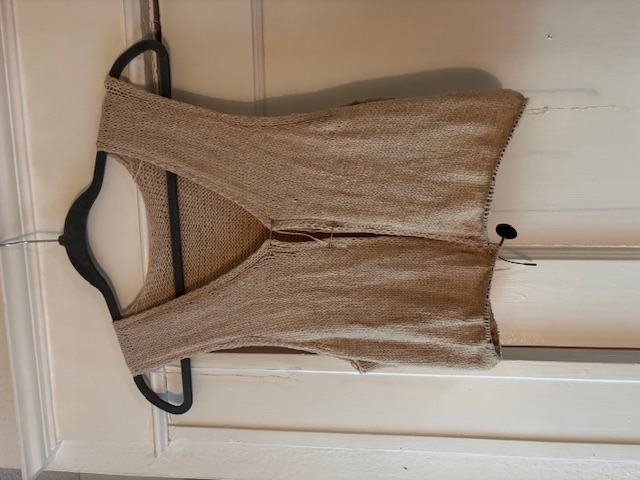
Around June 10 - nearly done?
I sat with this for a long time. It was finished…no way in hell was I going to tear it apart and go up a size? Start over?? Out of the question. So I sat more. I felt…defeated? I had just gotten done redoing the Sophie hood and was like, am I Bad at this?
But an idea hit me. It wasn’t that the vest altogether didn’t fit, it was just the chest area. Couldn’t I just make 2 panels, one for each side, to expand the circumference? The only hitch is that I couldn’t just pick up stitches on the side of the piece and start knitting (the stitches would be perpendicular to the existing stitches). I figured out I needed to knit the panels separately, then stitch them to the edges. After lots of math and learning about the mattress stitch, I had a plan.
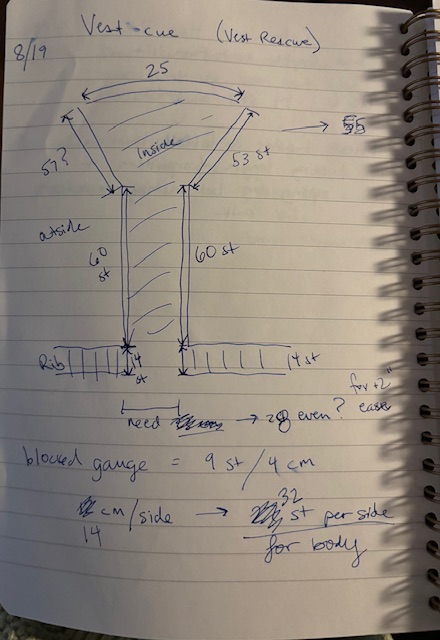
The plan? Construct 2 panels with the same number of rows to add ~14 cm to each side, which should enable the vest to meet in the middle of my body without wrestling it.
I’ll admit I also sat on this plan for a while because it seemed so intimidating. Plus the thought of revisiting a (by now) semi-cursed project put me off. But 2 weeks later, I was stitching together the end of the 2nd panel to the vest and thought, well that was silly to wait so long. The panels were constructed bottom up, and the only crisis in confidence I had was making sure to imitate the V-neck shaping as close as possible. The panels were attached using the mattress stitch, connecting the edge of the panel to the first stitch after the border edges on the vest.
 |
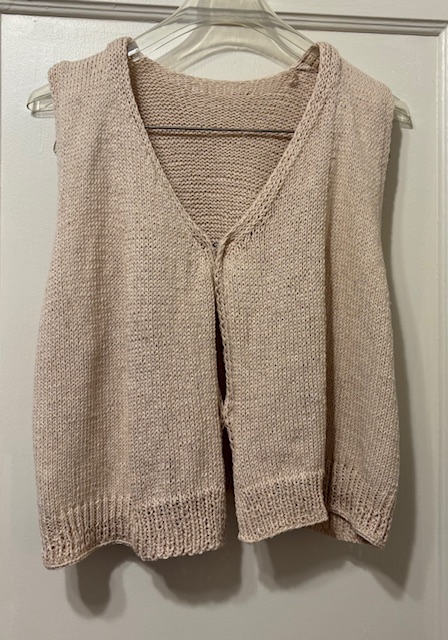 |
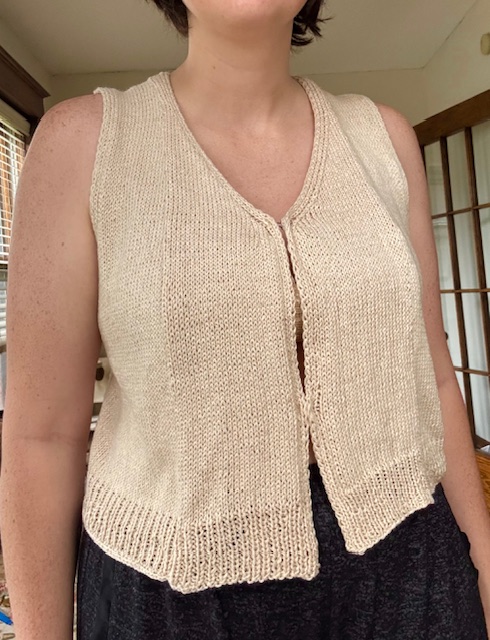
Actual finished piece !! On and off.
As you can see, it worked! The vest fits with so much more ease. Though no pictures exist of it, I decided to switch from the previous closure (i-cord ties) to hook and eye for a more seamless look. Now, is it perfect? No. Far from it1. But that doesn’t bother me one bit. Real clothes aren’t seamless or perfect and the fact that I could salvage this piece at all without starting over brings me so much joy and confidence back into my knitting.
The damn thing fits like how I imagined and while it didn’t quite make it as a “summer” vest this time around, it’ll be a staple wardrobe piece for a long time.
-
What’s wrong with the finished piece?
- Mattress stitch is less than seamless so we get that line going straight through my bust. Though this could also be from the 6 stitches that got covered up by the panels.
- When extending the ribbing on the original vest piece, I did not size down my needles so the original ribbing is US 4 while the expanded ribbing is US6.
- One of the panels was attached 1 stitch too high (I started stitching the panels above the ribbing border and then went back to stitch the ribbing together), so the ribbing is a little warped and one side is marginally longer than the other.
- I didn’t really figure out how to seamlessly attach the end of the panels to the neckline of the vest. Mattress stitch wouldn’t work since I wasn’t connecting 2 stitches side-by-side. I ended up just hand stitching the terminal stitches to the border of the vest. There’s definitely an apaprent seam but we can pretend that was the intended look.
I’m quite optimistic that once the piece is properly blocked, a lot of these asymmetries/tension problems could become less apparent. ↩